Entries in Crafts (86)

Saturday
May072011

Hair Towel Tutorial!

A long time ago my mom got me a hair towel for my birthday or something, and I love it so much that I copied the pattern and made myself several more.  They’re really easy and quick to make up, using a hand towel as the starting point.

I found some hand towels on sale for 50 cents each, and bought several.  Because I’m smart.  And because that’s how much I love these things.  I like that they’re smaller than a regular towel so they don’t flop all over the place, and there’s elastic in the back to secure it so it doesn’t fall off.  Also, it saves using 2 towels after my shower. 

My hair is really long, but it’s pretty thin.  If you have long/thick hair you could use a bath towel as a starting point instead, and just make your towel longer. 

I’ve made a sketch of the pattern and you can download it here if you want.  It’s a rough-ish sketch, but includes a 3/8” seam allowance.  It’s a guideline so you at least have the general shape — it’s easily modifiable if your towel is longer/shorter or you use a bath towel instead.

(When you print it out make sure that you print page 1 and check the 1” test box to make sure it measures 1” — you may have to remove the scaling option in your print settings to get the correct size).


Supplies needed:
Hand towel
Sturdy thread in a corresponding color
Heavy duty denim or jeans needle
3.5” of 1/4” wide elastic
1 button, approximately 3/4” or so wide
PDF pattern/guide

Step 1
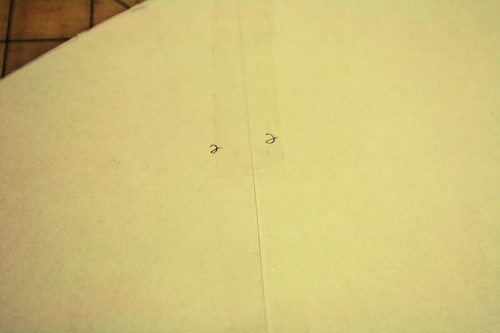
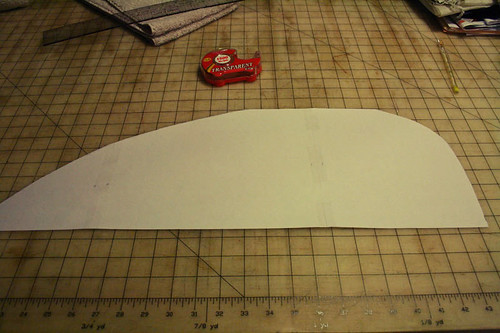
Print out and assemble the pattern pieces.  There are 3 pages, meant to be placed exactly next to each other (no overlap).  Match the numbers and tape the pages together.


Step 2
Cut out pattern.


Step 3
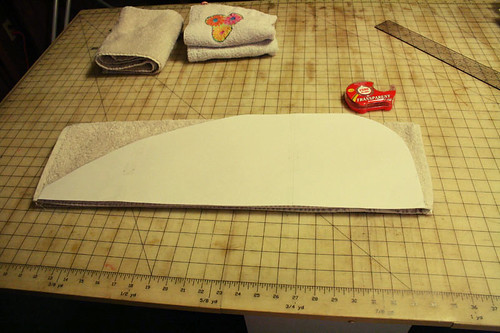
Fold the hand towel lengthwise, inside out, matching up finished edges.


If you have a decorated hem/edge, you may want to place this at the top so it’s visible when you’re wearing the hair towel.

Step 4
Trace the pattern onto the towel.   Lay the pattern so that the long straight edge matches up with the finished edges of the towel.


You’ll see that the pattern is a little wider than my towel, so I ignored the overlap and traced around it.


Step 5
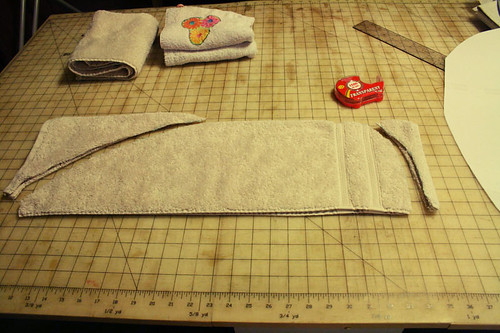
Cut along the marked lines.


Step 6
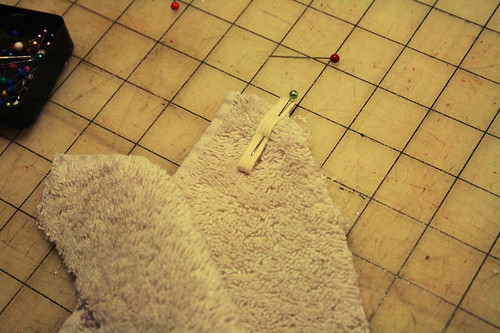
Cut 3.5” of 1/4” wide elastic. Fold in half. Open the towel, and pin the elastic between the two pieces, along the straight bottom edge.


Step 7
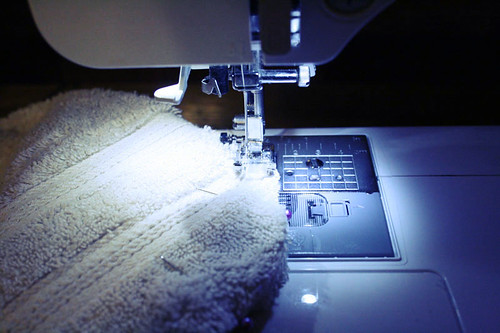
Stitch cut edges together using a heavy duty needle, making sure to catch elastic at the bottom of the towel between both towel pieces.


After using a straight stitch, go back over the cut edges using a zig zag stitch to prevent the towel from fraying.


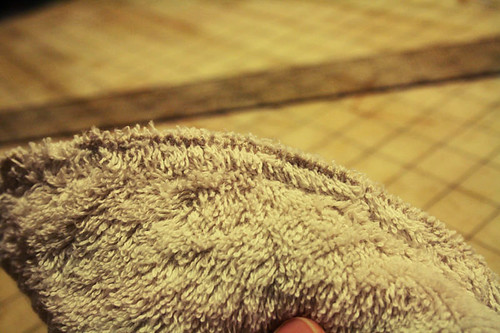
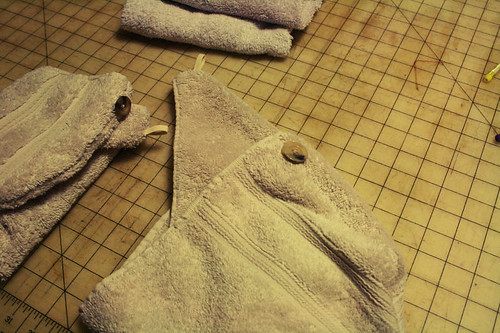
Turn right side out. This is what it should look like when you’re finished.


Step 8
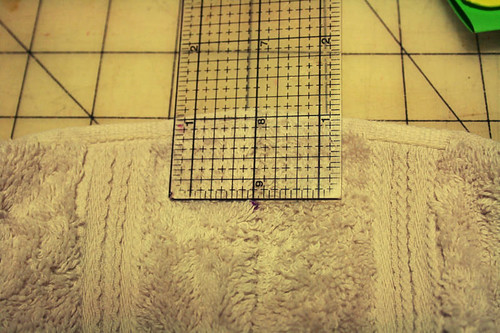
Along the top of the towel (the wide, curved edge) mark 1” down on the seam line.  This is where your button will go.


Center the button on the seam line, and stitch the 3/4” button to the towel, using your machine (or by hand).  Make sure it’s really secure on the towel.

And… that’s it!  All done.  Super easy, right?


Place it on your head, twist once or twice, and then bring the end back and loop the elastic around the button to keep it in place.


You can also add rickrack or an applique if you want to be fancy, or you’re making this as a gift.


If you make one please leave a link in the comments so I can check it out.  :)


Also, you can click here to download a printer friendly version of these instructions, if you’re so inclined. Am I thoughtful or what, right?  If anything’s not clear, or you have any questions, shoot me a message and I’m happy to help. 

Saturday
Apr232011

Doing all kinds of stuff I shouldn't be doing

So, we leave for NYC in less than 12 hours.  What should I be doing?  Packing, preparing my presentation for work, doing laundry, and cleaning the house. What *am* I doing? Finishing up some sewing projects.  I am all about the priorities.

I just bought the adorable Square Neck Dress pattern from Dandy Jane.  Love. It.  The simple design, and cute little flutter sleeves are perfect for the warmer weather.  The pattern itself is really, really well-written, and the diagrams are perfect.  It was easy to sew, but there were a lot of detailed steps and gathering which took a lot of time. 


Well worth it, though.  I really like how the inside of the armholes are finished (bias binding) to prevent exposed seams.  I have material for two more dresses, and the girls are already clamoring for me to make them.  Guess what I’ll be doing when we get back from NY?


I also wanted to make a stroller blanket for Thea.  The weather is iffy right now so she may not need it, but if it’s cold and windy then I wanted something that would fit on her stroller without dragging on the ground.  I searched for patterns and tutorials, and the closest I came was this from the Sew, Mama, Sew blog. 


Instead of making something completely new, I took an old blanket I’d made years ago, and just added some straps and snaps down the sides.  I sewed about a 3.5” loop to the top of each corner, so it’s wide enough to slide onto the stroller handles without being too loose.  I measured up 12” from the bottom of the blanket and added a snap there, and another one 6” down.  I put the blanket on the stroller and pinned to make sure everything would be placed well without dragging or hanging down, and then assembled it in about 10 minutes.


The blanket is probably a little wide, but it fits fine on the stroller and won’t drag on the ground, which is the most important part.  Also, Thea loves it.  When I put in on the stroller (with her in it) to triple-check the fit, she wouldn’t get back out.  I think it’s cute that it makes a little pocket for her feet.  Neato burrito.


Okay, now I really have to get my ass off the computer and work on my presentation, and finish packing.  Wish me luck.  I have to talk for 20+ minutes in front of a group of people I barely know, which is a pleasant addition to the already crushing stress of preparing to leave my kids for a week and traveling to NYC. Again. Hooray!

Saturday
Mar262011

Makin' stuff

I’ve gotten back into sewing a little, here and there.  I seem to have 2 or 3 patterns that I pull out regularly, and I keep making them over and over and over.  The Tee for Two by Patterns by Figgy’s that I just can’t get enough of, as well as the Swingset Skirt by Oliver + SBuilt by Wendy’s 3835 for shirts for me, too — I can put one together in about an hour and a half.


These are both the Tee for Two pattern, with the dress sleeves.  I used an LWI (low water immersion) dye technique, with procion dyes from Dharma Trading.  The girls picked out the iron-on rhinestone appliques — we’ll see how well they hold up to washing.


Same deal for Thea’s shirt, except no applique, obviously.  I extended the neckline a little bit on this one because this child? Literally has a head the size of a pumpkin.  She has store-bought shirts that fit her everywhere except the neck-hole.  We can’t get them over her head.  Sad, or funny?  I can’t decide.


On the horizon, this dress by Heidi & Finn, and also these pants.  I’m waiting on a new printer cartridge so I can print out the pants pattern — I’m so excited by the pleat detail on the bottom.

I also got a wild hair and decided to make some barrettes for the girls.  Originally, it was going to be a project we did together, but it’s a little too fussy for small fingers.  So, I made them some myself, and MAN. These are so much fun to put together, and super quick, too.


If you’re so inclined, check out the tutorial here.  I got the barrettes from this shop, and the ribbon at our local store ($0.50/spool).  I hot-glued the ribbon knot at the bottom just to make sure they wouldn’t come undone.  I have plans for several more, they’re quite addicting.

And one tiny note to close out this post: We’ll be moving to the NYC area at the end of June for my jay oh bee.  I’m scared shitless to move with four children, and to pack up a houseful of stuff and try to cram it into an apartment.  I’m excited for the possibility of moving, but also very wary of all the work entailed.  I promise to keep you posted — if you keep your fingers crossed for us.

Saturday
Nov062010

Deodorant!

I’ve been on a diaper ointment-making kick lately, so while gathering the supplies together for that I also decided to make some deodorant.  I first saw the recipe at SewGreen (see the entry here).  How easy does that look, right?

I didn’t have any arrowroot powder, so I ordered that some along with lemongrass EO from Sahara’s Supplies on Etsy.  Once everything got here, it took about 2 seconds to make.  I mixed all the powders together, and then melted 5TBS of coconut oil in the microwave.  I added the EO to the coconut oil, then mixed it all together into a really super runny paste.

I popped it into the freezer for a few minutes because I wanted to see what it would look like all firmed up (coconut oil is a solid at room temp, but has a very low melting point).  It looks exactly like the picture on the SewGreen site, like a really thick frosting.  I’m able to scoop it out of the container really easily and rub it on my skin with no trouble.

With the lemongrass EO it smells like candy.  In other words, I totally want to lick my pits.  It’s a little gritty going on, and I think it may leave some residue (like if I wear a tank top you might see it) but I’ll cross that bridge when I get there.  Also it’s not an antiperspirant, but I’m more concerned about smelling like a moldy sweat sock, so whatever.  Priorities, people.

So far so good, and the one batch made enough to keep me stink free for quite some time.  Score!

Monday
Sep062010

Sewing again

I finally broke out my machine this weekend and got some much-needed sewing done.  The problem is I don’t have a dedicated sewing space, so I have to set my stuff up in the computer room, where the kids run through, and the husband has his desk, and I have my desk, and the dogs are underfoot, and the ironing board blocks the door and…. what? No, I’m not bitter.

Anywho, I started off with some dipes for Thea, modified from the PooPockets pattern to be a pocket diaper (empty shell that you stuff with an insert). The pattern is perfect since I prefer to pin my dipes, it has elastic gussets, and the infant prefold diapers we have fit *perfectly* as the insert.  Also? They take maybe 10 minutes to sew.  I’m a genius.

Also, I made Thea a couple of new diaper covers (I love my snap press, so so so much) and then I made a couple of bibs out of some ratty dishtowels.  Thinking about putting together a tutorial for this — I can’t tell you how simple they are to put together, and they still fit Charlie and Phoebe for art projects and such. Again, with all the geniusing, I know.

I also made 42+ wipes.  I found this pretty cool flannel for $1/yard, and bought over 8 yards.  So I have plenty to spare, and tons to use for wipes.  Which always seem to go missing.  They’re probably off cavorting with the socks and having flannel sock babies somewhere.

In the spirit of Thea sewing, I realized the child has absolutely no clothing.  Ok, like maybe 2 tank tops, and that’s it.  Seriously. So I wanted to at *least* sew up some pants, but I don’t have any pants patterns for her size.  Also, I didn’t just want any pants pattern, I wanted one with a bum gusset.  Because that makes me happy. 

I tried modifying one of the patterns I already had, and that did not turn out very well.  I couldn’t figure out how to redraw the front crotch line and make the seams line up.  Are you bored yet? Me too.  So a quick Google search turned up the Big Butt Baby Pants pattern.  Heaven!  I usually don’t have such luck finding exactly what I want, and it was a download pattern, so points for instant gratification.  I sewed up 3 pair that night.  Easy, quick, and oh-so-cute.  Guess what Thea’s going to be wearing all winter? 


On the Made by Rae blog she linked to this Patterns by Figgy’s Tee for Two pattern.  Intriguing.  I hate knits with a fiery red-hot passion, but I’m going to give it a try.  I have some bamboo knit just sitting on my sewing shelf mocking me, so perhaps I can bust its ass into a tee for Thea.  We’ll see.  If that’s the case, then the child will be naked no longer. SUPER GENIUS.

Page 1 ... 2 3 4 5 6 ... 18 Next 5 Entries »